The second part of the tutorial describes several methods you can use for adding graphical images to Whiteboard pages. The methods include using clip art, using the drawing tools, capturing screen images, and using clip art as page background.
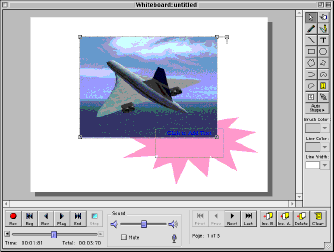
The Select Clip Art dialog box appears. Select Airplane 1 and click OK. eMail inChorus places the image in the placeholder box.
Click the Clear button on the Page Navigator tool bar. This provides you with a blank Whiteboard, ready for the next step.
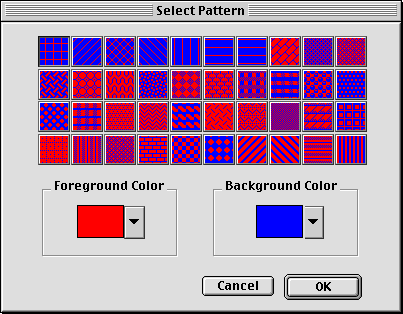
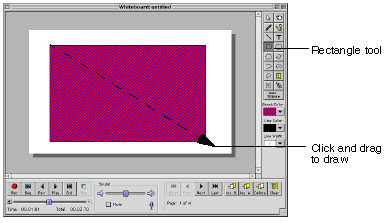
Click the Rectangle drawing tool to activate the tool. From the Brush Color menu, select More Patterns . The Select Pattern dialog box appears.
Position the cursor in the upper left hand corner and click and drag to the lower right hand corner to create a large rectangle, as shown in the example below.
Select Screen Capture from the Tools menu. Once selected, your mouse pointer will turn into a cross.Click and drag over the area you want your image to appear. Release your mouse and the image is captured.
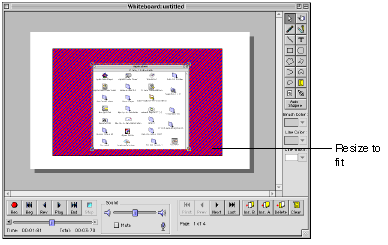
Select the image by clicking it once. Next, click and hold a corner of the image. The cursor should become a two-way arrow. Drag the corner of the image until the image is small enough to fit in the rectangle.
You may have to reposition the image in the rectangle after you shrink it.
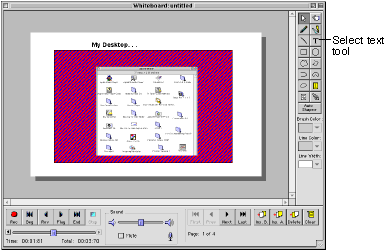
Click the Text tool on the drawing toolbar. Click a point on the Whiteboard, and then type "My Desktop. . .", as shown in the example below.
Click the Clear button to remove the template features from the new page.
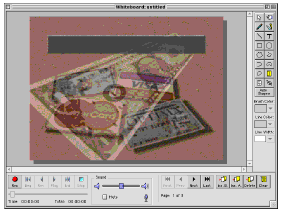
Choose Page Properties from the Edit menu. Select Page File on the dialog box and click Browse.
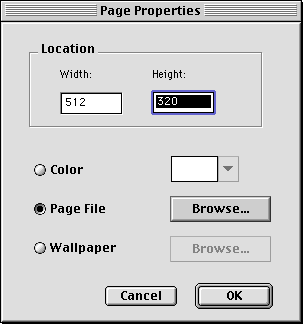
Open the Back Page folder and select Credit Card.wbp. Click Open
and then OK to display the Whiteboard with the new background.